
Publishing Your Aurelia App in Azure
If you have an Aurelia app served with .NET Core and want to host it as an Azure Web App, there are several ways to publish it.
I am using a PowerShell based approach to publish my app. It’s using FTP and transferring file by file to Azure, so it’s horribly slow. But it’s predictable and gets the job done. And with few modifications it will run from your CI server as well.
TL;DR The script is at the bottom of the post.
Prerequisites
You need to have an Azure subscription and set up a destination Web App.
Then install the Azure Resource Manager PowerShell Module on the computer you want to deploy from by opening a PowerShell window and running the following:
Install-Module -Name AzureRM
Functionality of the PowerShell Script
When running the script it will:
- Log you in to Azure
- Select your intended subscription
- Build the Aurelia project
- Build the ASP.NET Core project
- Remove any old slot named “staging”
- Create a new slot named “staging”
- Copy files and create needed directories
Notice that the Login window has a tendency to hide, so if you execute the script and nothing happens, go looking for the hidden Login window 🙂
There is a few constants in the script that you will have to adjust, namely the following:
$appdirectory = "C:/Source/DWx-Aurelia-dotNETCore/DWx.Webb/"
$publishdirectory = $appdirectory + "bin/Release/netcoreapp1.1/publish/"
$subscription = "MSFT-VSEnterprise"
$resourcegroup = "droid-worx"
$webappname = "droidworx"
$slotname = "staging"
And the explanation for the values supposed to be entered are:
1. $appdirectory – This is the root directory of your Aurelia app.
2. $publishdirectory – This is where your build ends up when doing a Release build of your .NET Core project.
3. $subscription – This is the name of your Azure subscription.
4. $resourcegroup – The name of the resource group you created your Web App under.
5. $webappname – The name of your Web App.
6. $slotname – The name of the slot you want to deploy too.
See the below image where the Resource Group, Subscription Name and WebApp Name are underlined.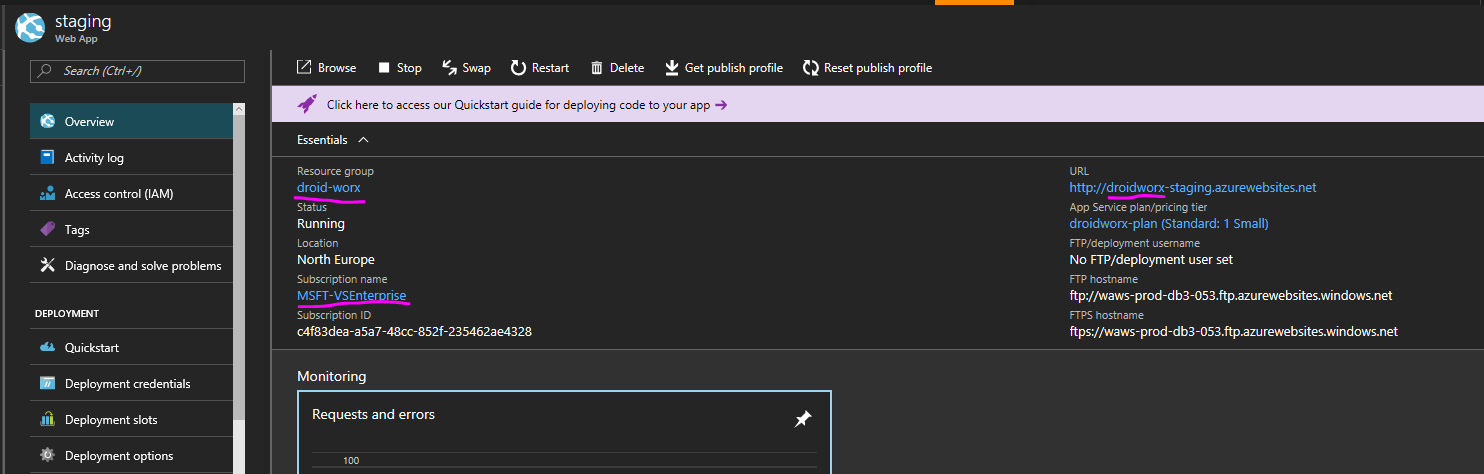
Things to Be Aware Of
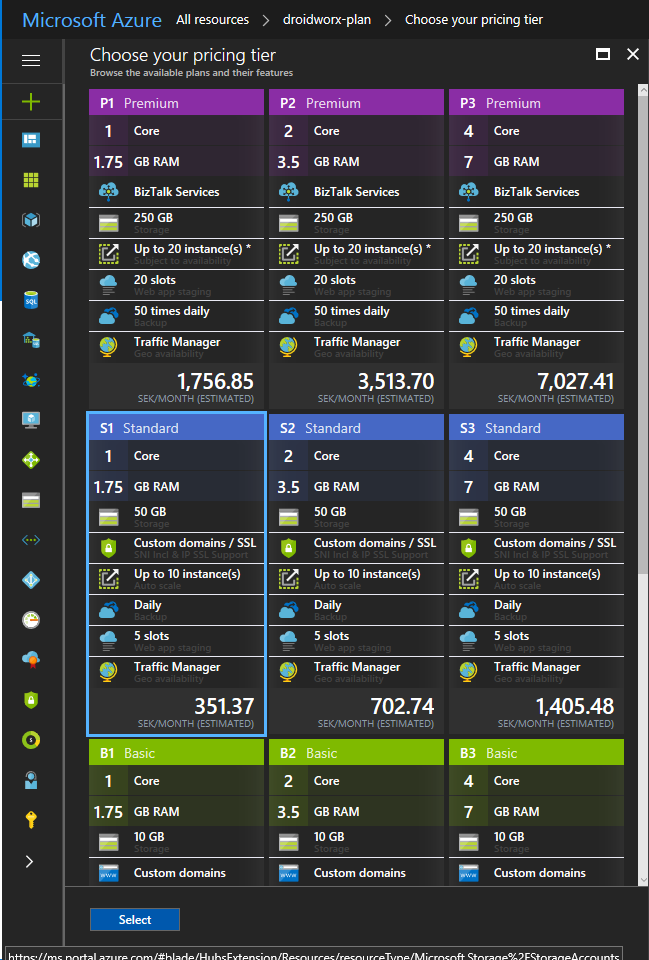
To have access to Slots, your App Service Plan needs to be a S1 or higher. If you wish to run on a smaller instance, it’s possible to rewrite the script to publish straight to the web app and not to a dedicated slot. (Not advised for production apps!)
Notice! The script will produce an error like the one below, if the “staging” slot can’t be found and deleted. This is ok and won’t stop the script from doing it’s job.
Remove-AzureRmWebAppSlot : Operation returned an invalid status code 'NoContent'
At C:\Source\DWx-Aurelia-dotNETCore\DevOps\deploy_to_staging.ps1:55 char:1
+ Remove-AzureRmWebAppSlot -Name $webappname -ResourceGroupName $resour ...
+ ~~~~~~~~~~~~~~~~~~~~~~~~~~~~~~~~~~~~~~~~~~~~~~~~~~~~~~~~~~~~~~~~~~~~~
    + CategoryInfo          : CloseError: (:) [Remove-AzureRmWebAppSlot], CloudException
    + FullyQualifiedErrorId : Microsoft.Azure.Commands.WebApps.Cmdlets.DeploymentSlots.RemoveAzureWebAppSlotCmdlet
The Script
#---------------- Define basic functions
function Create-FtpDirectory {
    param(
        [Parameter(Mandatory = $true)]
        [string]
        $sourceuri,
        [Parameter(Mandatory = $true)]
        [string]
        $username,
        [Parameter(Mandatory = $true)]
        [string]
        $password
    )
    if ($sourceuri -match '\\$|\\\w+$') { throw 'sourceuri should end with a file name' }
    $ftprequest = [System.Net.FtpWebRequest]::Create($sourceuri);
    $ftprequest.Method = [System.Net.WebRequestMethods+Ftp]::MakeDirectory
    $ftprequest.UseBinary = $true

    $ftprequest.Credentials = New-Object System.Net.NetworkCredential($username, $password)

    $response = $ftprequest.GetResponse();
    Write-Host Upload File Complete, status $response.StatusDescription
    $response.Close();
}
#---------------------------------------

#---------------- Define constants
$appdirectory = "C:/Source/DWx-Aurelia-dotNETCore/DWx.Webb/"
$publishdirectory = $appdirectory + "bin/Release/netcoreapp1.1/publish/"
$subscription = "MSFT-VSEnterprise"
$resourcegroup = "droid-worx"
$webappname = "droidworx"
$slotname = "staging"
#---------------------------------------

#---------------- Login to Azure, position in correct subscription
#Login uing an account with proper credentials in the Simplygon subscription!
Login-AzureRmAccount

#Select the 'Simplygon' subscription as or work space
Select-AzureRmSubscription -SubscriptionName $subscription
#---------------------------------------

#---------------- Build Code
Set-Location $appdirectory
#Build Aurelia code (Aurelia CLI needs to be installed globaly)
au build --env prod

#Build DotNet code
dotnet publish -c Release
#---------------------------------------

#---------------- Create the "staging" slot
#Remove old "staging"
Remove-AzureRmWebAppSlot -Name $webappname -ResourceGroupName $resourcegroup -Slot $slotname -Force

#Create a deployment slot with the name "staging".
New-AzureRmWebAppSlot -Name $webappname -ResourceGroupName $resourcegroup -Slot $slotname
#---------------------------------------


#---------------- FTP (using WebClient) code up to the "staging" slot
# Get publishing profile for the web app
$xml = (Get-AzureRmWebAppSlotPublishingProfile -ResourceGroupName $resourcegroup -Name $webappname -Slot $slotname -OutputFile "staging_profile.xml")

# Extract connection information from publishing profile
$username = $xml.SelectNodes("//publishProfile[@publishMethod=`"FTP`"]/@userName").value
$password = $xml.SelectNodes("//publishProfile[@publishMethod=`"FTP`"]/@userPWD").value
$url = $xml.SelectNodes("//publishProfile[@publishMethod=`"FTP`"]/@publishUrl").value

# Upload files recursively
Set-Location $publishdirectory
$webclient = New-Object -TypeName System.Net.WebClient
$webclient.Credentials = New-Object System.Net.NetworkCredential($username, $password)
$files = Get-ChildItem -Path $publishdirectory -Recurse | Where-Object {!($_.PSIsContainer)}
foreach ($file in $files) {
    try {
        $relativepath = (Resolve-Path -Path $file.FullName -Relative).Replace(".\", "").Replace('\', '/')
        $uri = New-Object System.Uri("$url/$relativepath")
        "Uploading to " + $uri.AbsoluteUri
        $webclient.UploadFile($uri, $file.FullName)
    }
    catch {
        for ($i = 3; $i -lt $uri.Segments.Length - 1; $i++) {
            $newpath = $uri.AbsoluteUri
            for ($j = $uri.Segments.Length - 1; $j -gt $i; $j--) {
                $newpath = $newpath -replace $uri.Segments[$j], ''
            }
            try {
                "Creating directory: " + $newpath
                Create-FtpDirectory $newpath $username $password
            }
            catch {
                "Does directory exist?: " + $newpath
            }
        }
        "Trying new upload to " + $uri.AbsoluteUri
        $webclient.UploadFile($uri, $file.FullName)
    }
}

$webclient.Dispose()
#---------------------------------------
Happy Coding! 🙂
Nice work! I’ve been using VS2017’s Right Click + Publish, but I’ve been constantly thinking about a way to deploy straight from powershell since I do all my work in Code 🙂
Thanks 🙂
Yeah right click publish is pretty great tbh, blazingly fast compared to this FTP-approach. But Automation is needed at times, for ex when getting coffee!