
As I was starting a new Aurelia 2 project, I realized I wanted a quick way to produce files for a new component. On top of creating files, I also want some editing to happen. 🤔 VS Code Tasks to the rescue!
Even though this article shows examples for Aurelia 2, it’s applicable when working with other frameworks too, be it React, Vue, Angular, Svelte or whatever you prefer 💖
Disclaimer
This task needs PowerShell as the default VS Code terminal
🚧 Aurelia Project Structure
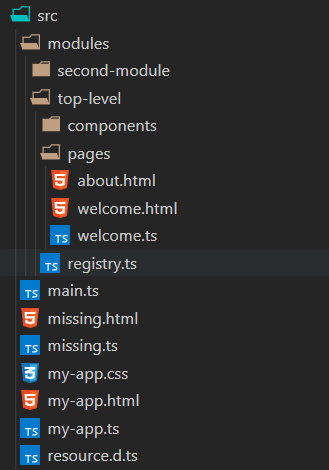
The way I prefer to setup the components in my Aurelia 2 projects is to have
- Code and markup separated by modules
- Every component in a separate folder
- Every component always has a TypeScript, HTML- and CSS file
- The module containing a component has a “registry” file that exports all the components
- That registry file is then injected into the DI container, at startup or dynamically, and makes all those components seamless to use with the router and other components
🧱 Creating a New Aurelia 2 Component
For creating a new component named my-component, according to the list above, I would create and do the following:
- The folder modules/top-level/components/my-component
- The files
my-component.ts/html/cssin the above folder - Add
export * from "./components/my-component";toregistry.ts
🛠️ Could This All Be Solved with a Task?
Why yes it most definitely can! Or at least with a series of tasks 😁
The important thing about the task is to, before executing it, position in the registry.ts file. This is very important because the last step will edit the current opened file, so don’t miss that!
The main task consists of running 5 different tasks. From creating the folder, to the files and finally adding a reference to the newly created component in the current file.
The steps, and their order, are defined by using the dependsOn property. It’s important that dependsOrder is set to sequence so that the steps don’t execute in parallel.
The name of the component is prompted for in the componentName input, and that’s used in the rest of the script.
To prevent any mishaps, there’s a check if the directory exists before creating it. We’re also using -NoClobber on the file creation. This will fail the task if any file already exists.
🐚 PowerShell to the Rescue
For the actual work I use PowerShell commands. Most of it is straight forward, creating a string then pipe-ing it into a file.
The most non-straightforward part of the script is when I need to create a class name from the component name:
((Get-Culture).TextInfo.ToTitleCase(('${input:componentName}'.ToLower() -replace '-', ' ')) -replace ' ', '')
👩💻 The Code
The entire task looks like below.
{
  // See https://go.microsoft.com/fwlink/?LinkId=733558
  // for the documentation about the tasks.json format
  "version": "2.0.0",
  "tasks": [
    {
      // Create a registry.ts file in the root of your modules folder
      // Position in the registry.ts file before running the task
      "detail": "Create the TS, HTML and CSS files for a component",
      "label": "au2 create component",
      "type": "shell",
      "dependsOrder": "sequence",
      "dependsOn": [
        "create folder",
        "create ts file",
        "create html file",
        "create css file",
        "append to registry"
      ],
      "presentation": {
        "reveal": "silent",
        "panel": "shared"
      },
      "args": ["${input:componentName}"]
    },
    {
      "label": "create folder",
      "type": "shell",
      "command": "If (!(Test-Path ${fileDirname}\\components\\${input:componentName})){md ${fileDirname}\\components\\${input:componentName}}"
    },
    {
      "label": "create ts file",
      "type": "shell",
      "command": "'export class ' + ((Get-Culture).TextInfo.ToTitleCase(('${input:componentName}'.ToLower() -replace '-', ' ')) -replace ' ', '') + '{}' | Out-File -FilePath ${fileDirname}\\components\\${input:componentName}\\${input:componentName}.ts -NoClobber"
    },
    {
      "label": "create html file",
      "type": "shell",
      "command": "'<div class=\"' + '${input:componentName}'.ToLower() + '\">\r\n${input:componentName}\r\n</div>' | Out-File -FilePath ${fileDirname}\\components\\${input:componentName}\\${input:componentName}.html -NoClobber"
    },
    {
      "label": "create css file",
      "type": "shell",
      "command": "'.' + '${input:componentName}'.ToLower() + '{\r\n    width: 100%; \r\n}' | Out-File -FilePath ${fileDirname}\\components\\${input:componentName}\\${input:componentName}.css -NoClobber"
    },
    {
      "label": "append to registry",
      "type": "shell",
      "command": "'export * from \\\"./components/' + '${input:componentName}/${input:componentName}\\\";' | Out-File -FilePath ${file} -Append -NoClobber"
    }
  ],
  "inputs": [
    {
      "id": "componentName",
      "description": "Name your component",
      "default": "new-component",
      "type": "promptString"
    }
  ]
}
To use it, copy the task and input into your existing tasks.json file.
🕹️ Running the Task
To run the task, open the Command Palette -> Run Task -> au2 create component
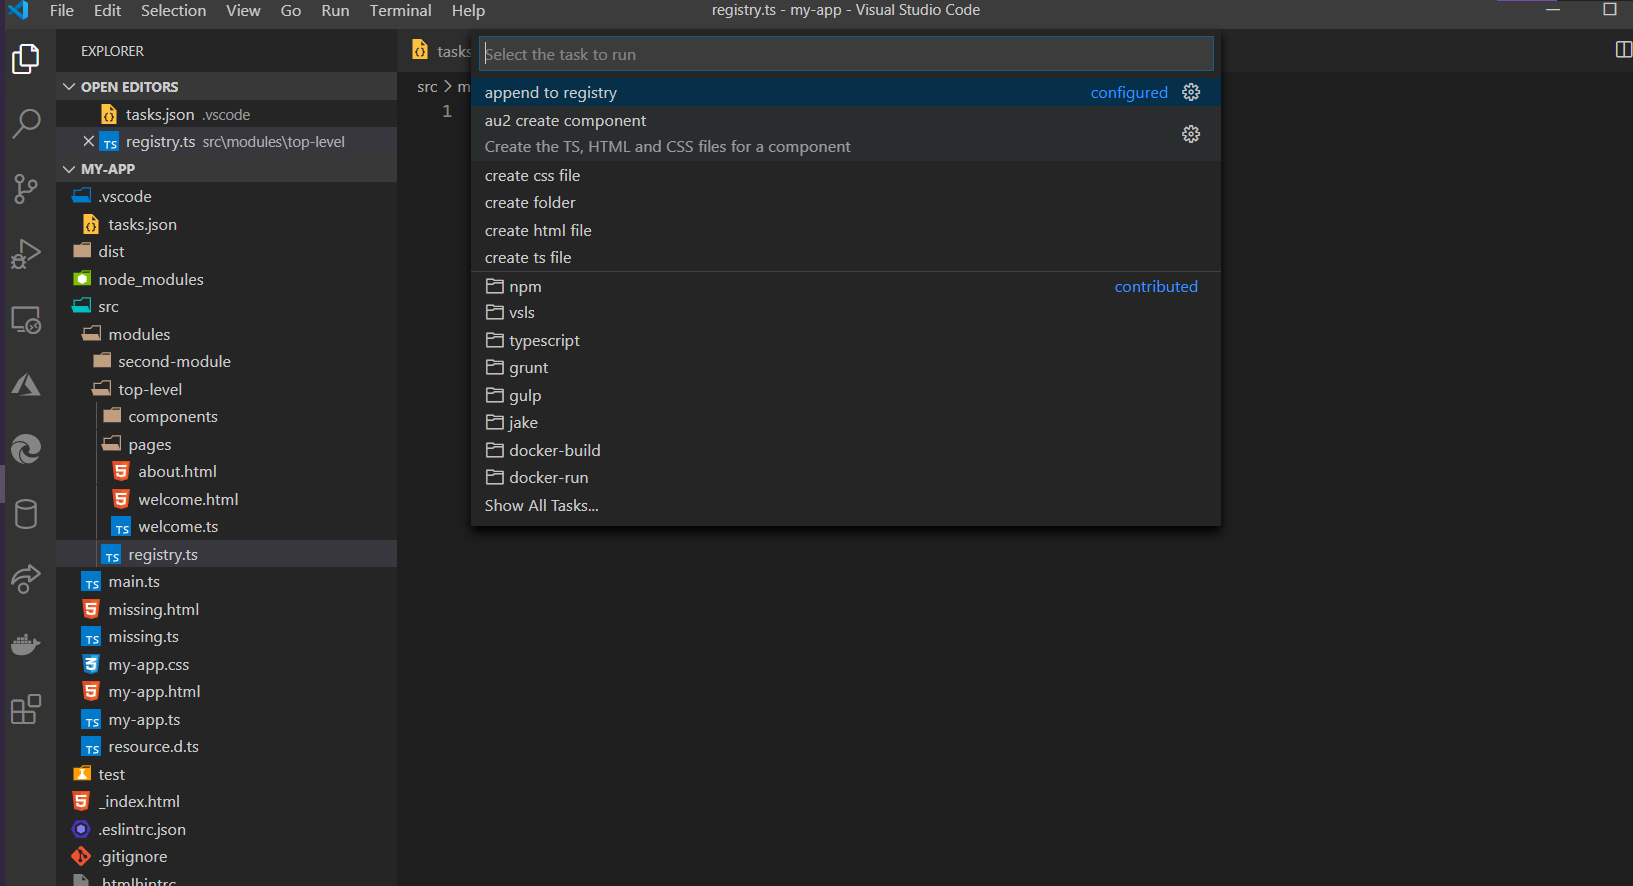
When prompted, give the new component the required name!
When executed, VS Code will open a Terminal window and output the result there. If the task isn’t producing the expected result, check the output in that terminal window to make sure everything worked as expected.
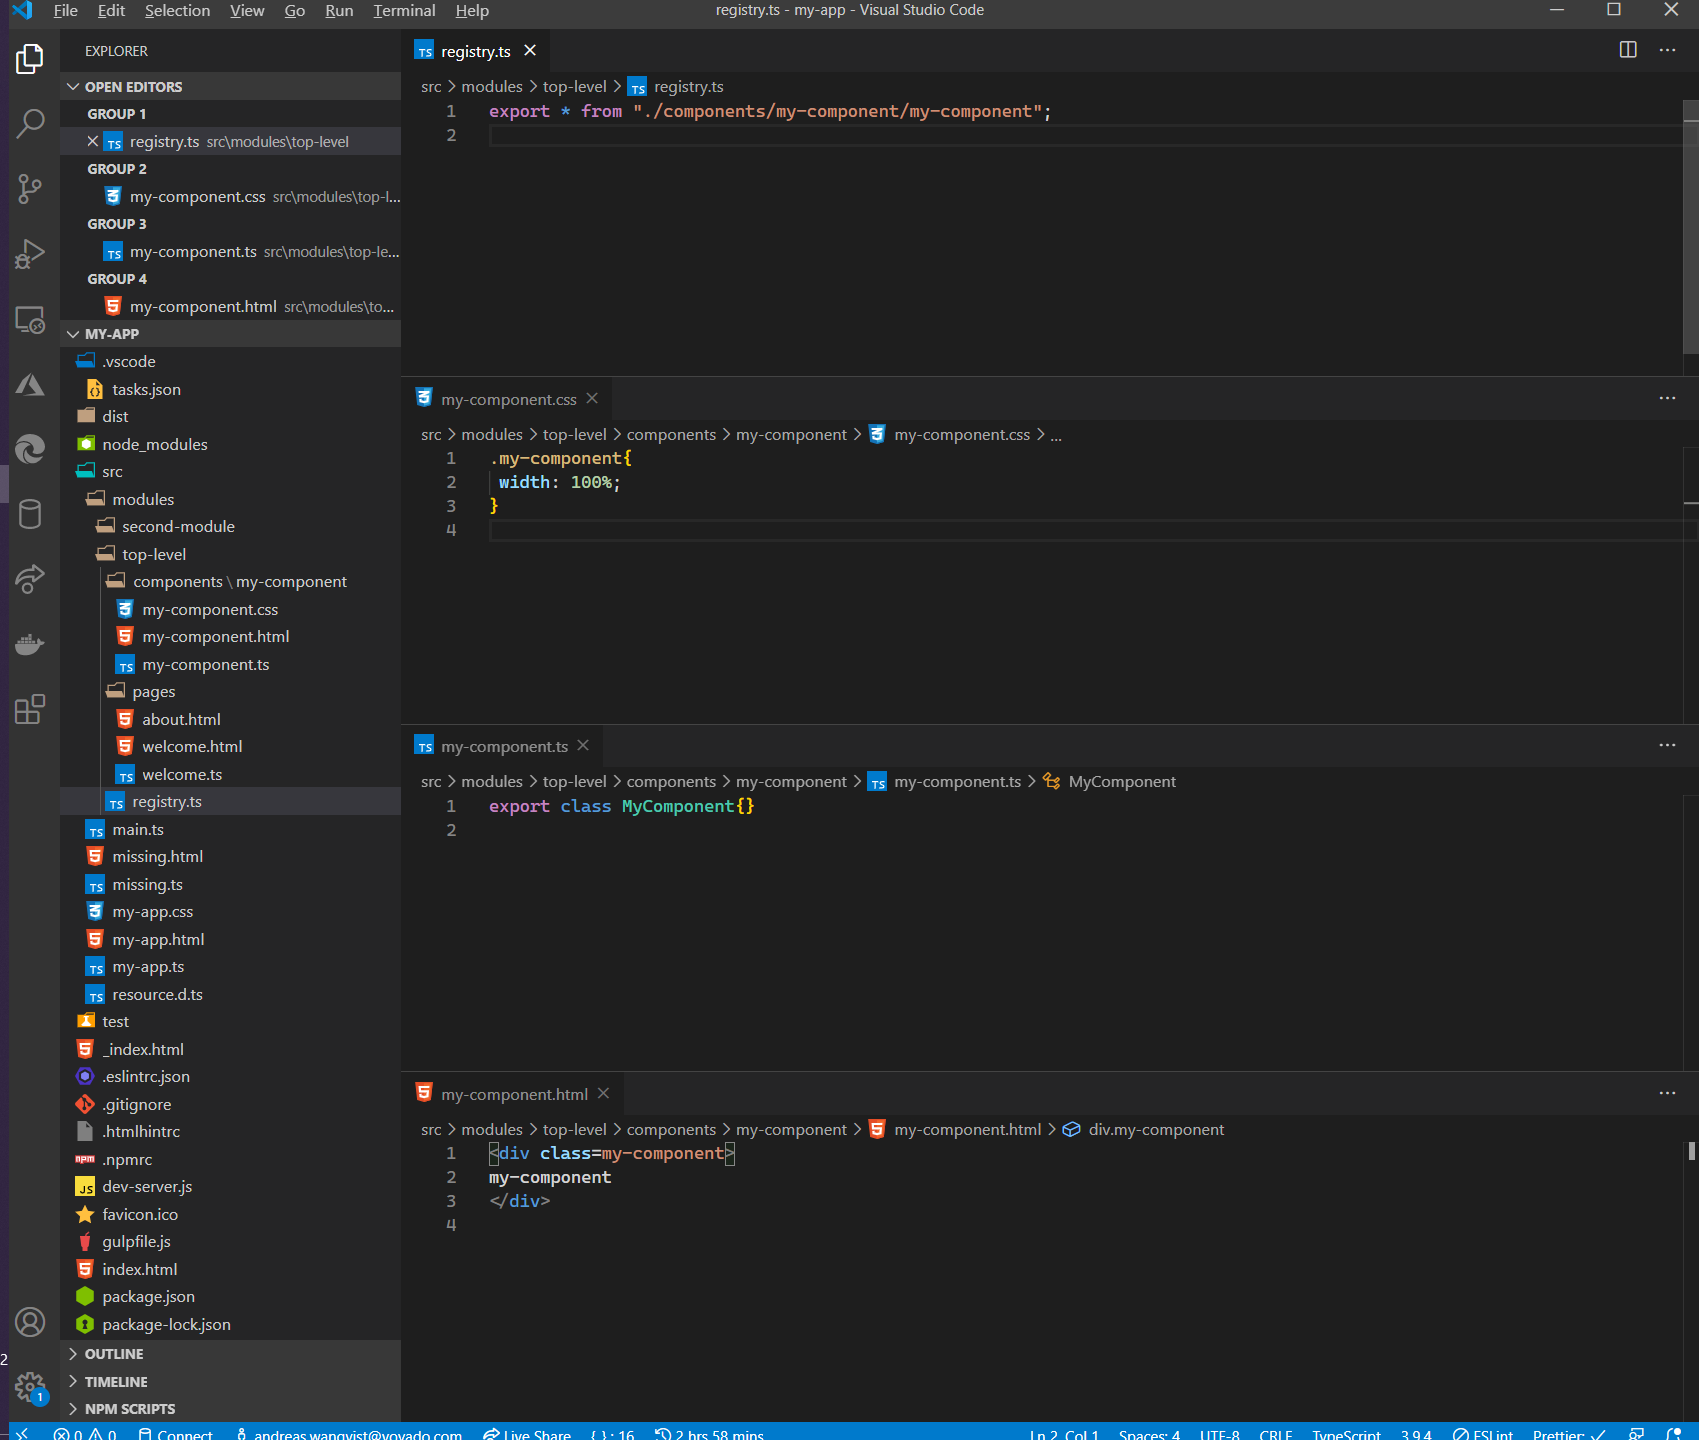
The end result is a folder with the files created and an entry in the registry file. See below.
⌨ Key Bind the Task!
As we are developers and need to move quick 😂, a key binding is of the essence! You can key bind this task in VS Code by opening the command palette, choosing Open Keyboard Shortcuts (JSON), then add the snippet below 👇
 {
    "key": "ctrl+shift+c",
    "command": "workbench.action.tasks.runTask",
    "args": "au2 create component"
 },
This will bind the task to ctrl+shift+c
You might prefer to bind it to something else 🙂
🔮 Conclusion
VS Code tasks in combination PowerShell with are powerful! 💪
This article might have shown how to create what I want for an Aurelia component, but you can easily modify it to fit whatever needs the framework you are using has, be it Vue, Angular, React or whatever.
🔗 Resources
A Gist with the code for the task on my GitHub page
Download and install PowerShell (it works for Linux and macOS too! 🐧)
Read more about Aurelia 2 on the docs site
Running Aurelia 2 apps in Azure like a boss
Happy Coding! 😊
Pingback: A Productive Aurelia 2 Build Setup - mobilemancer
Pingback: Write Your Own File Uploader in Aurelia 2